
Epoxy Floor Installation: What to Expect
Think of an epoxy installation as a relay. Inspection hands off to preparation, preparation sets how well the coating grabs hold, and the handling of the cure influences how the finished floor performs once people start using it.

The Short Answer
Five stages, in order: inspect the concrete, grind and clean it, repair visible damage, build up the coating layers and let the floor cure. Before work starts, your installer walks your slab in person and talks through how this particular floor will be handled.
What Happens During Professional Epoxy Floor Installation?
All five stages run in a fixed sequence, with every one laying groundwork for whatever comes after it.
01
Evaluate the Concrete
Step one: your installer examines the slab up close. Readings for moisture, a check for traces of old sealer or coating and a careful study of the surface add up to a clear read on the concrete, which steers the coating recommendation and how much prep is needed.
02
Prepare the Surface
Epoxy wants concrete that has been roughened by machine, giving the material tooth to hang onto. Diamond grinding or shot blasting shaves away the slab’s dense cap and leaves that profile behind. How much effort this stage takes rests on the concrete’s history, any coating already present and whatever has built up on top.
03
Repair Cracks and Defects
Now that bare concrete is showing, cracks, spalls and other damage get addressed. Repairing before any coating goes on leaves each flaw visible, so each one can be sized up and treated individually.
04
Apply the Coating System
Coats go on in the order the manufacturer prescribes, starting with primer, followed by the base coat and an optional decorative broadcast, and finishing with the topcoat. Each layer must reach its proper set before anything goes over it.
05
Allow the Floor to Cure
After the topcoat, the floor earns back its uses one at a time: walking first, vehicles later, full chemical resistance last. When each happens depends on the system and conditions, which your installer goes over, milestone by milestone, before the project begins.
What Makes a Professional Installation Different?
Look-alike slabs can hide very different stories. Under a close inspection, one may carry heavy moisture, stubborn coating residue and cracks that move, whereas its neighbor turns out dry, clean and solid. Any professional evaluation worth the name picks up on that contrast rather than handling both as identical jobs.
Coatings that give out early rarely do so for no reason. The usual suspects are moisture, product selection and installation conditions, and preparation is often part of the problem as well. Handling each one with care lays a better foundation for long-term performance.
Whenever your own concrete is on your mind, tell us about your floor to request a customized quote.
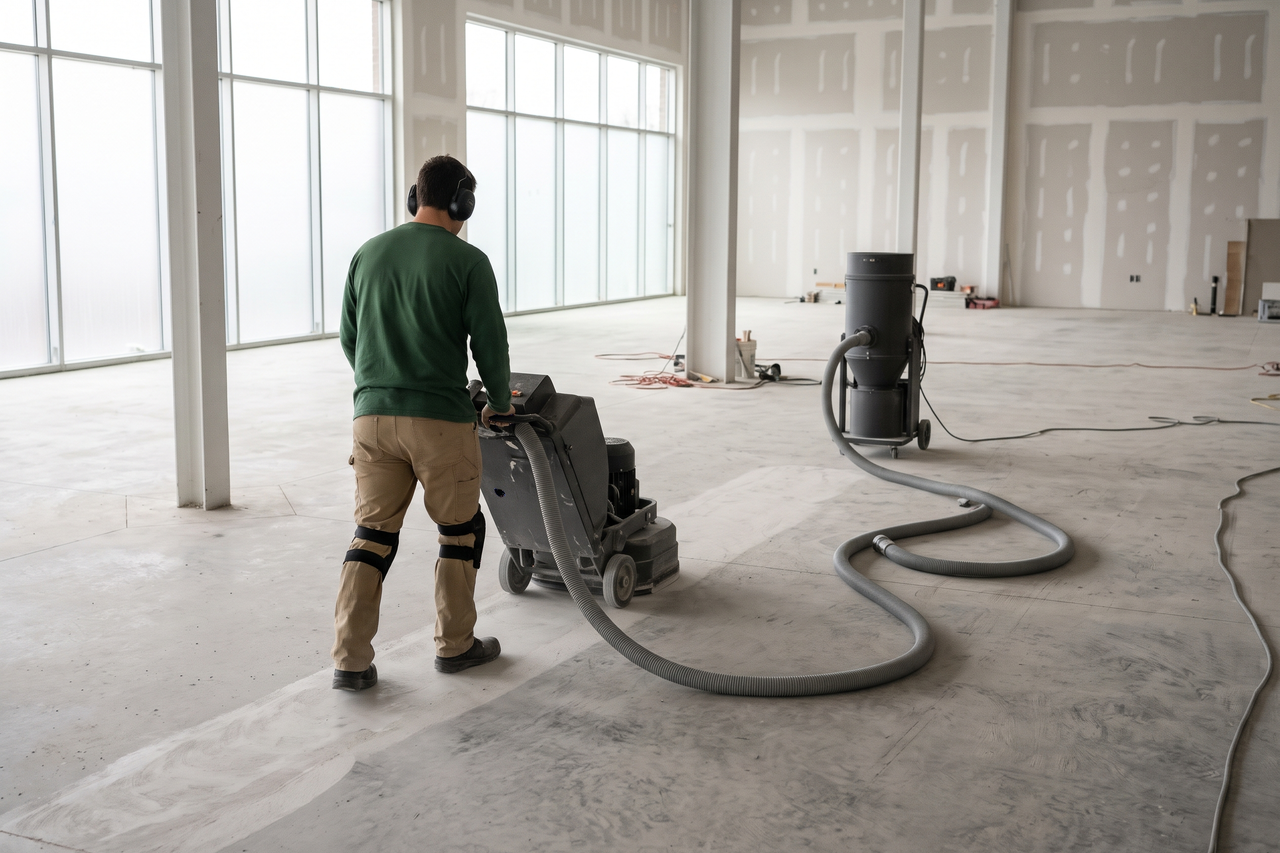
Why Concrete Preparation Matters
Grinding approaches, crack repair and moisture testing each get a fuller, practical treatment in our deep dive on readying a slab for epoxy.
Epoxy hangs onto concrete by mechanical grip. Once grinding has opened the pores, the coating flows into that rough texture and keys itself in. A sealed, painted or glass-smooth troweled slab offers next to nothing to hold, so an unprepared surface puts the bond at a disadvantage from the first coat.
How much prep a floor needs comes down to its past. Brand-new, unsealed concrete is a world away from concrete carrying layers of old paint, mastic or repeated sealer coats. Your installer sizes the prep to what the surface actually reveals, not to a single rule applied across the board.
Repairing Cracks and Surface Damage
Repairs happen with the slab stripped bare. Once old coatings are gone and the surface is profiled, the full reach of cracks and weak zones becomes visible, and each gets fixed while it is still in plain view.
No two cracks get identical treatment. A shallow, stable hairline is handled differently from one that keeps widening or has a lipped edge where one side sits higher. Active movement might call for a flexible filler or heavier repair work; either way, your installer describes the approach to each defect ahead of the work.
Rolling coating over an untreated crack simply buries the problem. Edges along the crack can begin peeling up, and ongoing movement can eventually push the crack back into view as a line in the new finish. The stage when the slab lies bare is the moment to deal with defects properly.
Applying the Epoxy Coating System
Weighing the two chemistries on durability, UV behavior and application? Our epoxy-versus-polyaspartic breakdown lays them out.
Once prep is complete, layers go on in sequence. Primer wicks into the profiled concrete and anchors everything that follows. For a flake design, chips get tossed across the freshly rolled base coat, embedding themselves before the resin sets.
The topcoat is the wear layer, facing shoes, dropped tools, tires and cleaning chemicals as the floor is used. Product, number of coats and film build all get chosen to suit the job; a commercial floor under heavy machinery and regular chemical contact calls for a heavier build than a lightly used home garage. Throughout the process, temperature and humidity get monitored, since both affect build and adhesion coat by coat.
How Long Does Epoxy Flooring Take to Cure?
Want to know what moves the price of a coating project? Our look at what epoxy floors cost explains how size, condition and system choice play in.
Readiness arrives in steps rather than all together: walking comes first, vehicles after that, and the full measure of chemical resistance last of all. Pushing the coating harder before it reaches the corresponding stage can leave marks or damage that resist repair.
Peak chemical resistance waits on cross-linking, which must run through the full depth of the film. To the touch, the surface can seem firm while that chemistry is still underway, so hardness by itself is not proof of readiness. Cure timing depends on the system and conditions, which is why your installer covers it with you up front, considering floor size, condition, prep needs and the chosen system.
Frequently Asked Questions
Q: What does a concrete inspection uncover ahead of the work?
The inspection sets the course for everything else. Moisture testing, a note of whatever sealer or coating is already present, a walk along every crack and a read on surface profile together reveal the fitting system and the prep the slab will take. Skip it, and any recommendation is a guess.
Q: What can poor prep do to a new coating?
Adhesion lives or dies on the texture grinding leaves. Too shallow a profile, too slick a surface or leftover smears of old coating all undercut the bond before the first coat. If a coating peels early, moisture, product choice and installation conditions all get scrutiny, with preparation often part of the problem alongside them.
Q: Is coating over an older coating ever an option?
Occasionally, depending on what is already down. If the old coating still grips tightly, has no lifting and will bond with the new product, coating over it may be possible once an on-site evaluation confirms it. Anything peeling or delaminating generally needs stripping first. Your installer looks over the existing finish and lays out the choices.
Q: When is the floor ready for foot traffic, vehicles and chemicals, and who tells me?
Ahead of the work, your installer spells out each milestone: when walking on the floor is fine, when vehicles may roll back in and when full chemical resistance has developed. The sequence depends on the system and conditions, as well as floor size, current state, the prep involved and the product chosen.
Q: Is a crack showing through the finished floor a sign of coating failure?
Usually not. When a crack reappears through a finished coating, the cause is typically movement in the slab underneath, whether settling, shifting or expansion tied to moisture, rather than a fault in the product. A flooring professional can examine it, explain what is probably behind it and say if a repair is worth doing.
Q: Do temperature and humidity on the job site influence the outcome?
Yes. Coating manufacturers publish limits on temperature and humidity during application and cure, and working beyond them can weaken adhesion or leave the coating setting unevenly. Your installer confirms conditions before starting and keeps monitoring them as each coat goes down.
Ready to Upgrade Your Concrete Floor?
Serving Batesville, AR and surrounding areas. Share a little about your concrete and how the room is used, then request a customized quote.